


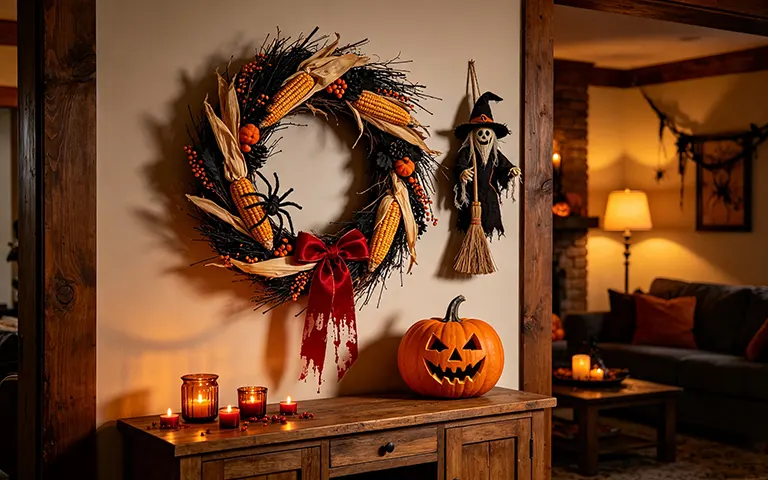
Spooky wreath inspiration

20 years of experience as a home decor consultant, specializing in furniture selection, space-conscious layouts, and practical interior solutions.
A Halloween wreath is one of the easiest ways to make your front door feel instantly spooky. It also gives you plenty of room to get creative, whether you prefer creepy spiders and black florals or something cute and autumn-inspired. Wreaths have long been used to welcome guests and mark seasonal celebrations, and today they remain a simple way to give an entryway a finished look.
For this roundup, I focused on DIY Halloween wreaths that are realistic to make at home, using supplies you can find online or at common craft stores. I also considered the cost of the materials, how complicated each project is, and how easily the finished wreath can be displayed on a front door.
You don’t need professional crafting skills, either. Basic wreath forms can be made from materials such as grapevine, wire, foam, straw, or simple craft rings, giving you plenty of inexpensive starting points.
I’ve included Amazon shopping links for the supplies used in each idea, so you can find everything without hunting down individual materials. One quick tip: check the finished wreath’s weight before choosing a hanging method, especially for heavier designs. A suitable wreath hanger, magnetic hook, or adhesive system can help protect your door while keeping your decoration securely in place.
Now, grab your glue gun and let’s make your front door the spookiest one on the block.
Key Takeaway
- DIY Halloween wreaths can be beginner-friendly: Most of these projects use simple materials and basic techniques, so you don’t need advanced crafting skills to create a polished result.
- Choose based on your available time: Projects range from about 30 minutes to 1.5 hours, making it easy to find an option for a quick weekend craft or a slower movie-night project.
- There’s a style for every Halloween mood: Go creepy with skeleton hands, eyeballs, or spiders; choose gothic black roses for a dramatic look; or keep things playful with candy corn, witch hats, or colorful tulle.
- Material costs vary by design: Simple projects can use inexpensive craft supplies, while more elaborate wreaths require additional florals, decorations, or specialty materials.
- Consider where you’ll hang the wreath: Lightweight designs work well on most doors, while heavier wreaths may need a stronger hanger or additional support to keep them securely in place.
- Outdoor placement needs extra planning: Weather-resistant materials, secure attachment methods, and a covered entryway can help your wreath last longer, especially in rain or wind.
At A Glance
| Wreath | Cost | Time | Style |
|---|---|---|---|
| Classic Deco Mesh Pumpkin Wreath | ~$85 | 45 minutes | Classic & festive |
| Cheesecloth Ghost Wreath | ~$78 | 1 hour | Spooky & cute |
| Yarn Pom-Pom Wreath | ~$67 | 1.5 hours | Cozy & modern |
| Skeleton Hands Wreath | ~$65 | 35 minutes | Creepy & dramatic |
| Black Rose Gothic Wreath | ~$68 | 1 hour | Gothic & elegant |
| Candy Corn Ombre Tulle Wreath | ~$45 | 45 minutes | Playful & kid-friendly |
| Witch Hat Wreath | ~$80 | 1 hour | Whimsical & spooky |
| Eyeball Wreath | ~$62 | 1 hour | Bold & creepy |
| Buffalo Plaid Fall-oween Wreath | ~$72 | 1 hour | Cozy & versatile |
| Spider Infestation Wreath | ~$69 | 45 minutes | Creepy & horror-inspired |
| Candy Wreath | ~$87 | 1.5 hours | Colorful & interactive |
The Classic Deco Mesh Pumpkin Wreath
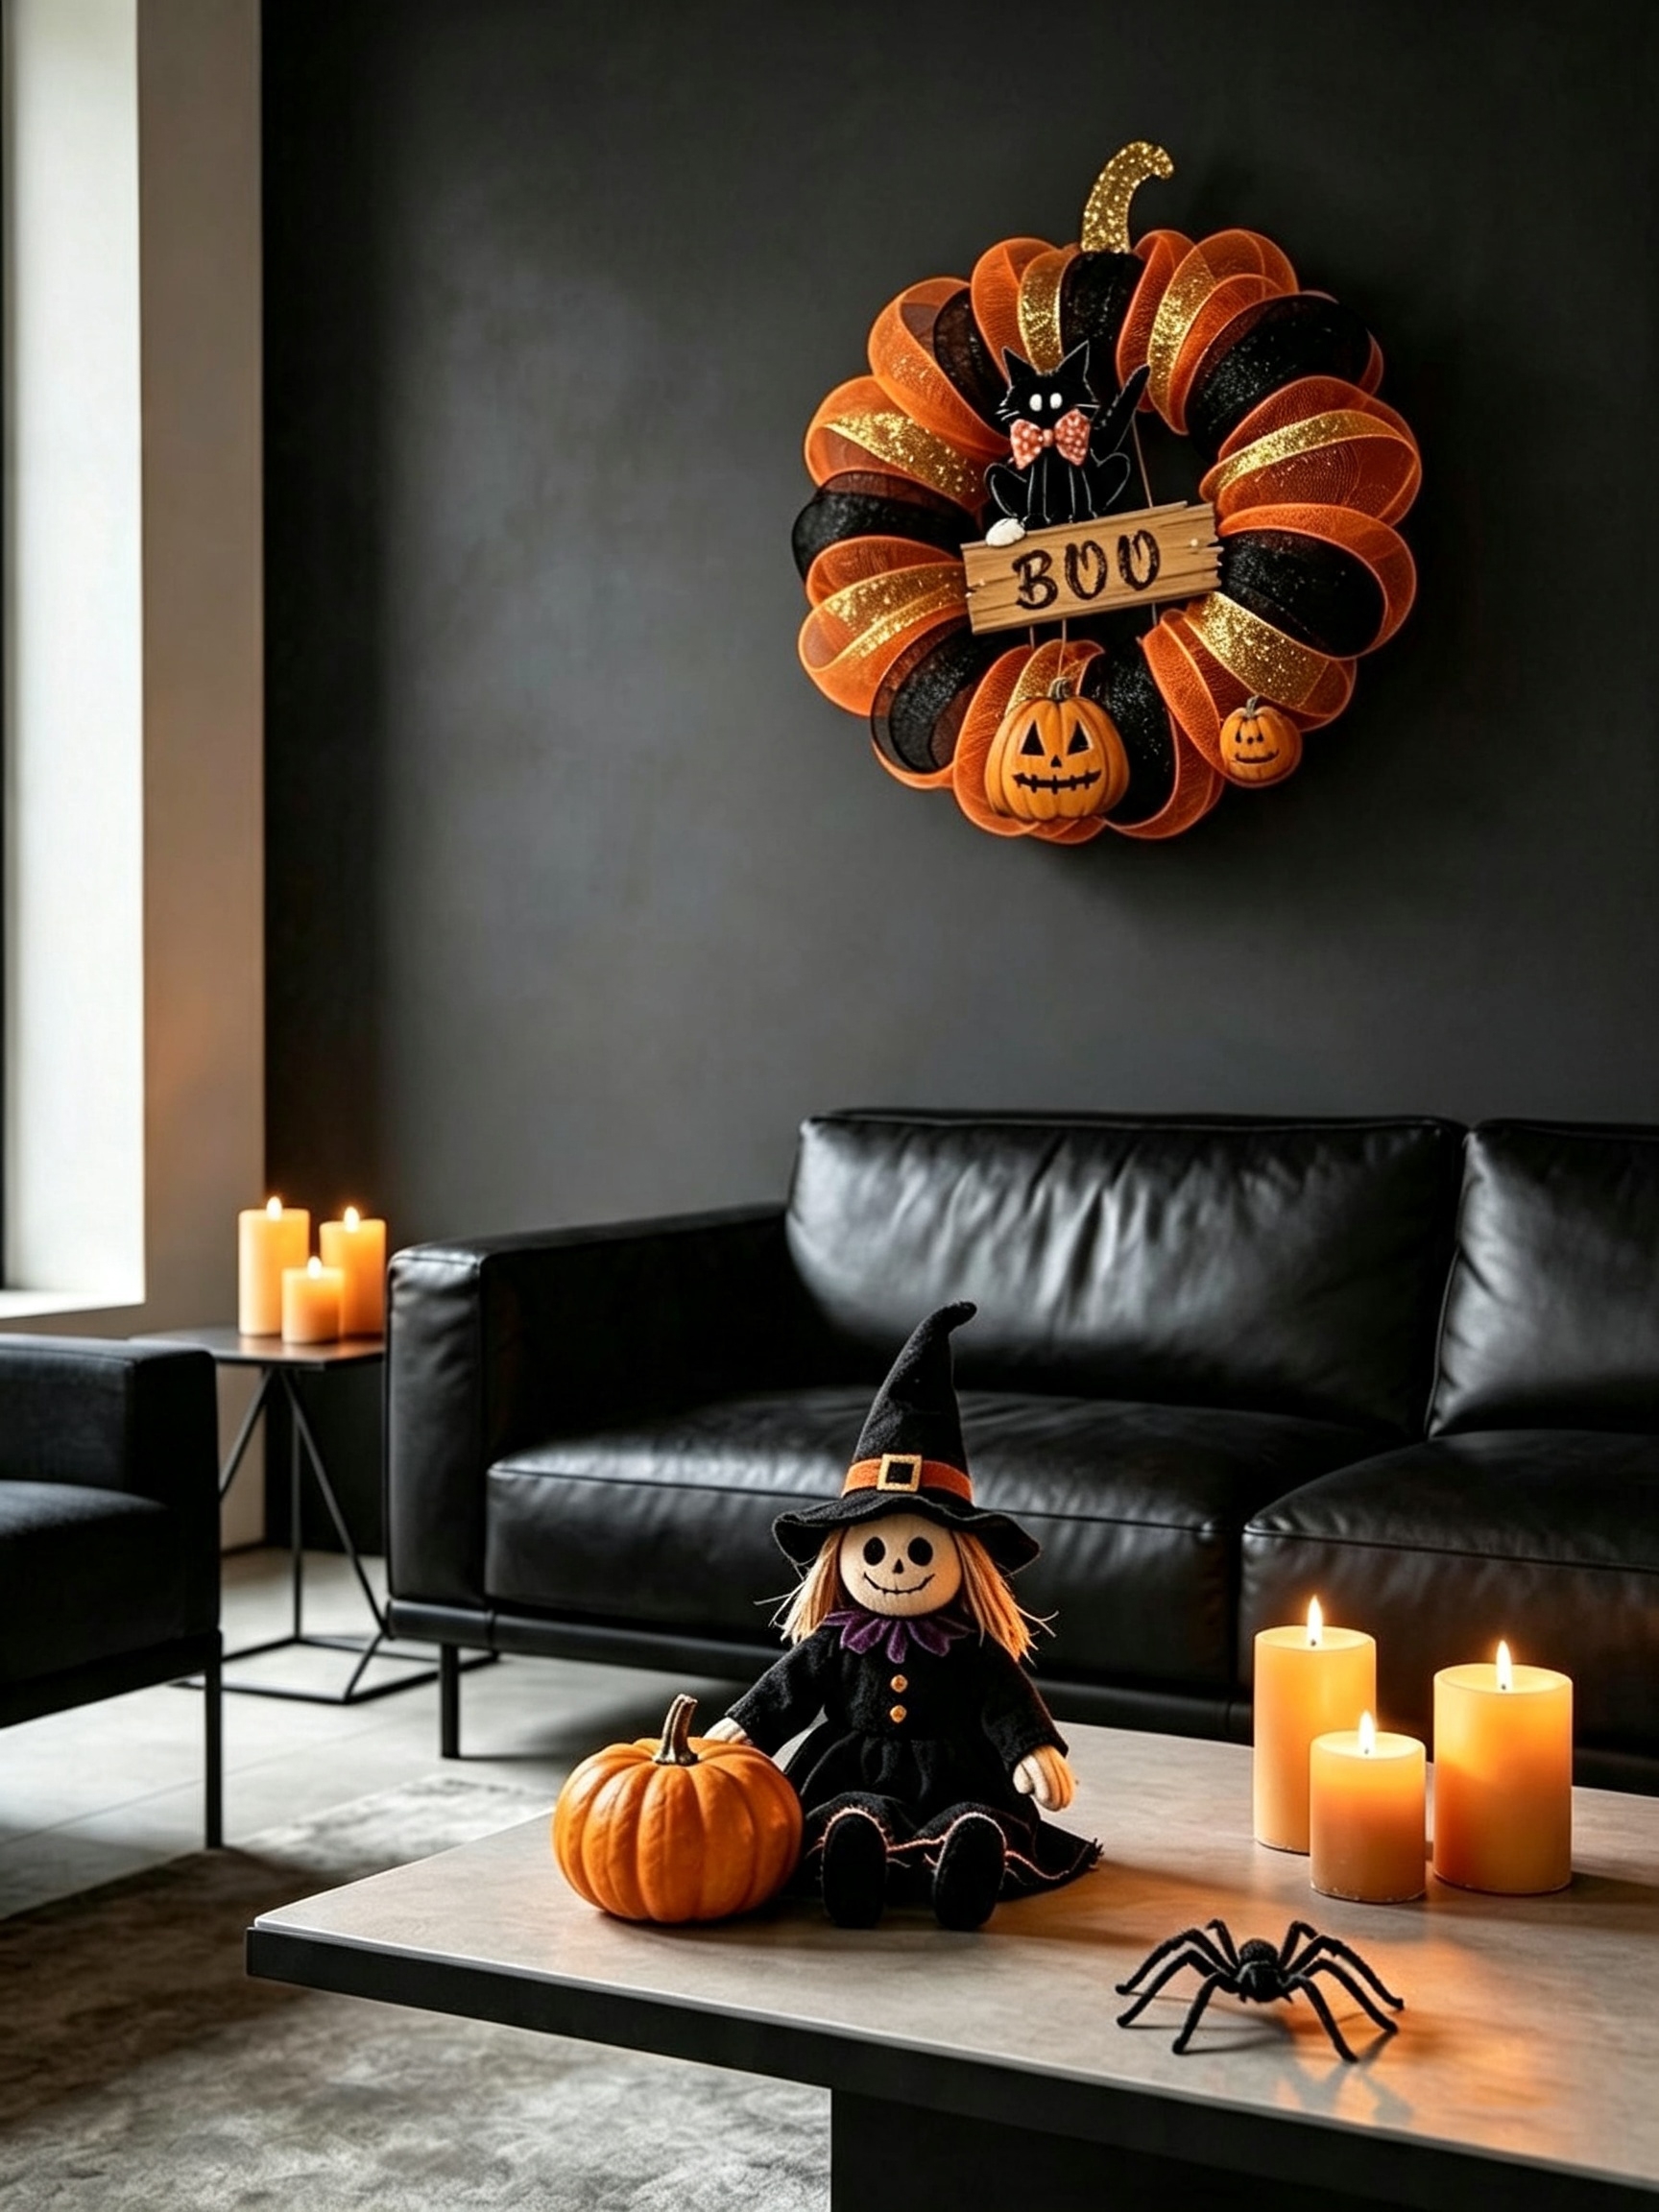
Deco mesh is the undisputed queen of Halloween wreaths, and it’s easier to work with than it looks. The key is gathering the mesh in even sections and securing each one tightly to the wire frame with pipe cleaners – no fancy techniques required.
Once you get into a rhythm, the wreath fills up fast, and the final result is full, textured, and bursting with Halloween color. This is the wreath that looks the most “store-bought expensive” of any on this list, yet it comes together for about the price of a latte.
It also holds up beautifully in outdoor weather, making it ideal for front doors that get rain or wind.
Cost: ~$85 | Time: 45 minutes
Supplies on Amazon:
- Orange Deco Mesh Ribbon
- Black Deco Mesh Ribbon
- Wire Wreath Frame 14-inch
- Pipe Cleaners Craft Set
- “Boo” Halloween Sign
How to make it:
- Use a 14-inch wire wreath frame
- Gather orange deco mesh in 10-inch sections and secure with pipe cleaners to the frame
- Alternate with black mesh for contrast
- Top with a burlap ribbon bow and a “Boo” sign (optional)
Pro tip: Curl the mesh loops with your fingers as you go for extra fullness – the more loops, the fluffier the finished wreath.
|
MUST READ: |
Cheesecloth Ghost Wreath
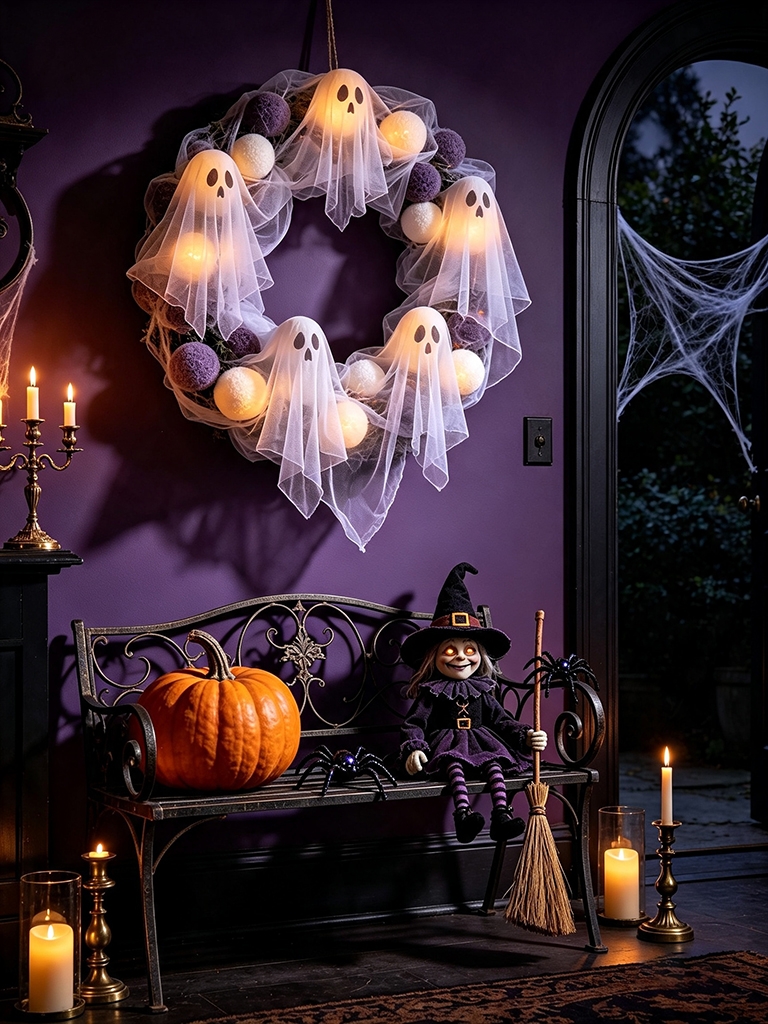
This one went viral on Pinterest for good reason – it’s equal parts spooky and adorable. The magic happens when the stiffened cheesecloth drapes over each little foam ball, instantly transforming them into floating ghosts with a soft, ethereal look.
It’s one of the few Halloween wreaths that works just as well in a kids’ hallway or classroom as it does on a front door. Parents love that it’s spooky without being scary, and crafters love that it takes less than an hour.
If you want that “How did you make that?!” reaction from neighbors, this is the wreath to build this season.
Cost: ~$78 | Time: 1 hour
Supplies on Amazon:
- Cheesecloth Fabric
- Foam Wreath Form
- Foam Balls Craft Set
- White or Black Wired Ribbon
- Fabric Stiffening Spray
- Tacky Glue
How to make it:
- Wrap a foam wreath form with white or black ribbon (the color it’s up to you)
- Drape cheesecloth over small foam balls (hot glued around the ring) to create little “ghosts”
- Dot tacky glue on each ghost for eyes and a mouth
- Mist the cheesecloth with stiffening spray so it holds its shape

The Yarn Pom-Pom Wreath
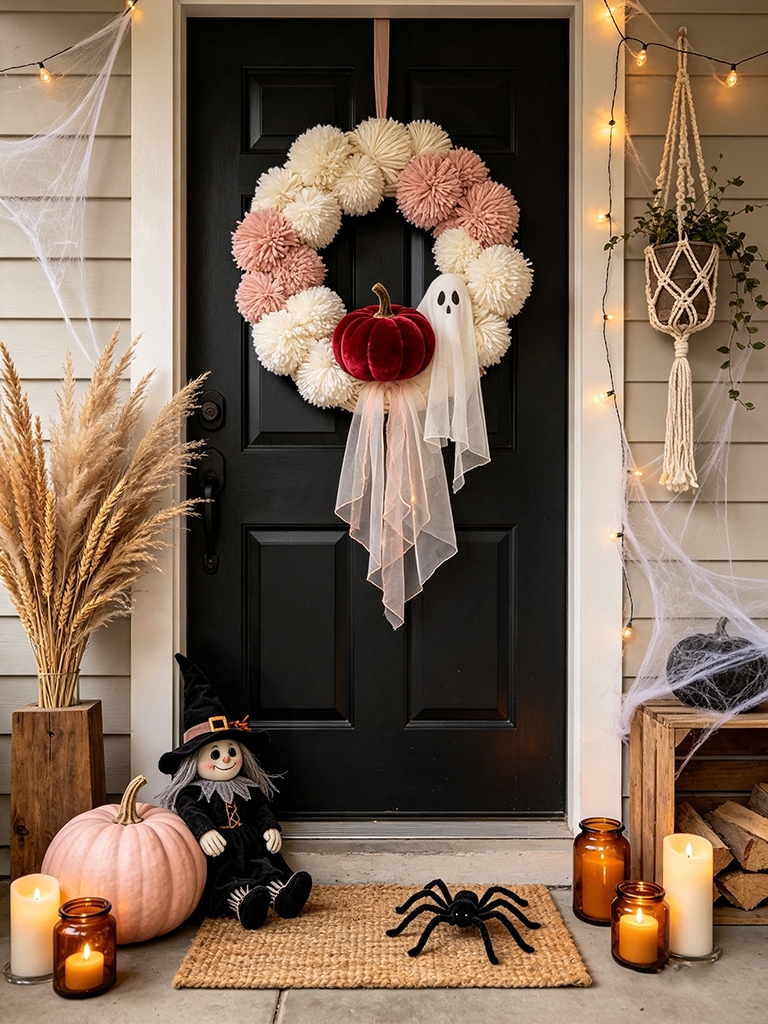
Perfect for crafters who want a cozy, modern Halloween aesthetic – no spooky screams here. This wreath is essentially a chunky, textured hug for your front door, and it’s the ideal project to make while binge-watching your favorite Halloween movies.
Because the pom-poms are made independently, this is also a fantastic “slow craft” you can spread across a few evenings – make a few pom-poms a night and assemble on the weekend.
The color palette is completely customizable too: go classic orange and black, or soften it with cream and blush for a boho-Halloween look that’s all over Pinterest right now.
Cost: ~$67 | Time: 1.5 hours (great for movie night!)
Supplies on Amazon:
- Yarn Multi-Pack (Orange, Black, Cream, Purple)
- Pom-Pom Maker Set
- Foam Wreath Form
- Felt Fall Leaves
- Mini Faux Spiders
How to make it:
- Make 20-25 pom-poms in orange, black, cream, and purple yarn
- Hot glue them tightly around a foam wreath form
- Tuck in felt leaves or tiny faux spiders between poms
Skeleton Hands Wreath
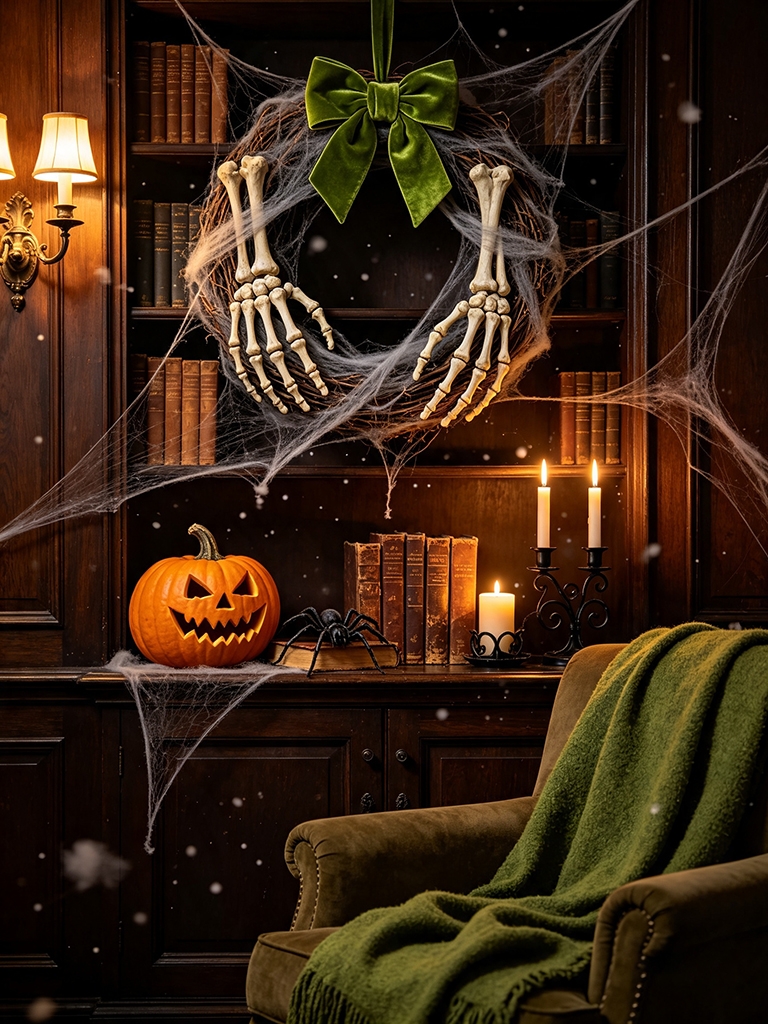
Creepy? Yes. Show-stopping? Absolutely. This wreath delivers that haunted-house energy people crave in October, but it comes together in just 30 minutes – making it the fastest project on this list.
The dollar store is your best friend here, since plastic skeleton hands are usually just a dollar or two each. Arranging the fingers so they curl inward creates a “reaching” effect that photographs incredibly well, which is exactly why this design keeps going viral year after year.
Add the stretched spider web for that final abandoned-and-creepy touch that makes guests do a double take.
Cost: ~$65 | Time: 35 minutes
Supplies on Amazon:
How to make it:
- Grab 2-6 plastic skeleton hands from the dollar store
- Spray paint them bone white (or leave them as-is for a more weathered look)
- Arrange them in a circle on a grapevine wreath so the fingers “grab” inward
- Add faux spider webs stretched between the hands
|
MUST READ: |

Black Rose Gothic Wreath
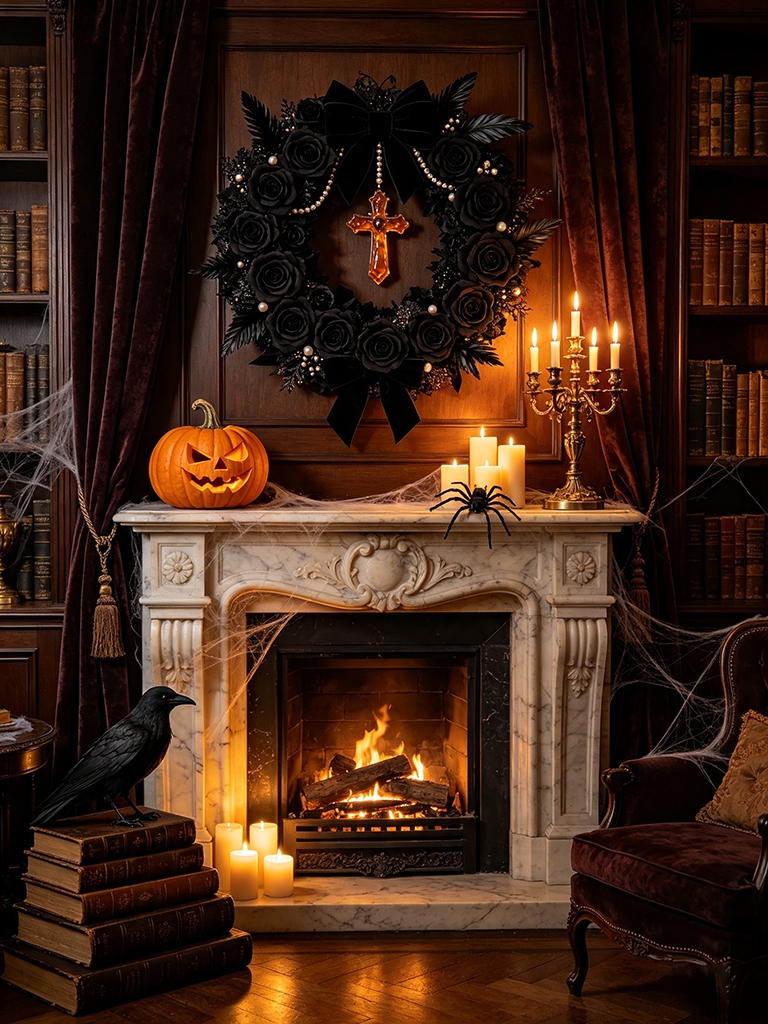
For the maximalists who believe Halloween is a whole lifestyle. This wreath leans into dark romance – think Victorian gothic, velvet, and moody elegance.
It’s stunning hanging on a matte black or deep green door (or above a fireplace), and it pairs beautifully with gothic decor like lanterns, ravens, and candelabras. Layering is what makes this one special: start with the roses, then tuck in feathers and pearls so no bare spots peek through.
While it costs a few dollars more than the other wreaths here, it looks genuinely high-end – the kind of piece you’d see in a boutique for $60 or more.
Cost: ~$68 | Time: 1 hour
Supplies on Amazon:
How to make it:
- Start with a black-painted grapevine or foam wreath form
- Hot glue faux black roses (dollar store florals work great) all the way around
- Tuck in black feathers, burgundy accents, and a few “dripping” pearl sprays
- Finish with a velvet ribbon hanger

Candy Corn Ombre Tulle Wreath
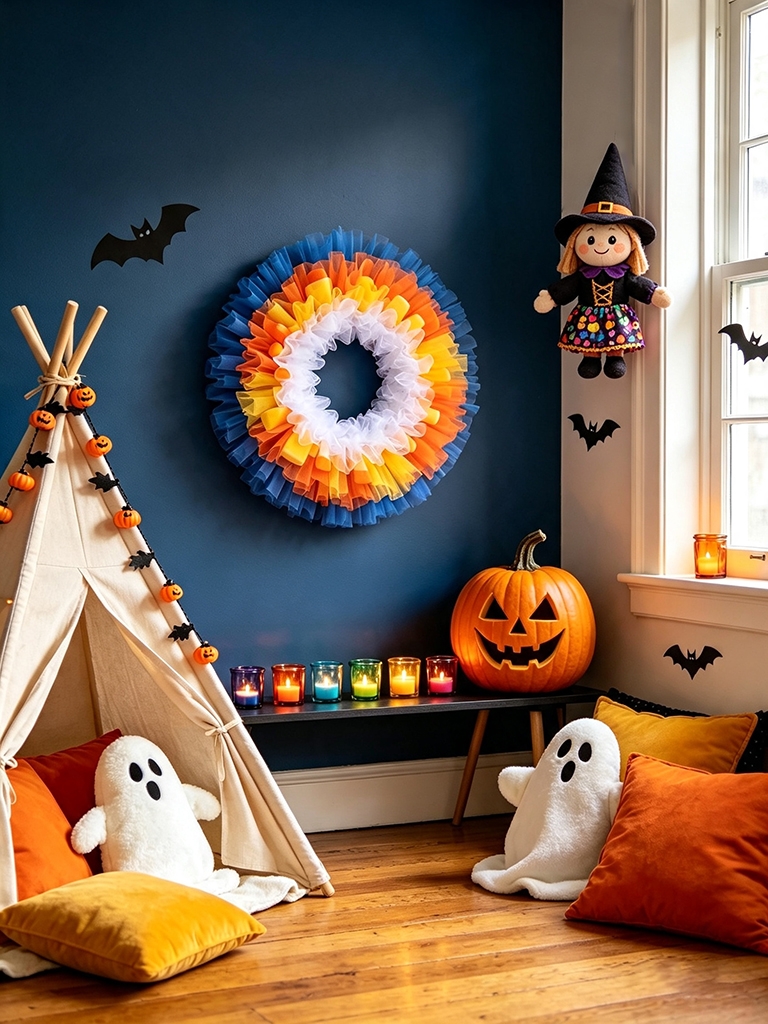
Kid-friendly, cheerful, and done in under an hour. This is the perfect first craft project to do with little ones – the only skills required are cutting and knotting, so even a five-year-old can help.
The ombre effect comes together automatically as long as you keep your color sections in order, which means there’s almost no way to mess it up. The finished result is bright, playful, and instantly recognizable, making it a favorite for classrooms, apartments, and doors where you want smiles instead of screams.
It’s also one of the lightest wreaths, so it won’t weigh down a flimsy door or hook.
Cost: ~$45 | Time: 45 minutes – easy enough to do with kids!
Supplies on Amazon:
How to make it:
- Cut tulle in 6-inch strips in white, orange, and yellow
- Knot strips onto a wire frame, working in sections: yellow inside, orange middle, white outside
- Fluff and trim the ends
|
MUST READ: |
Witch Hat Wreath
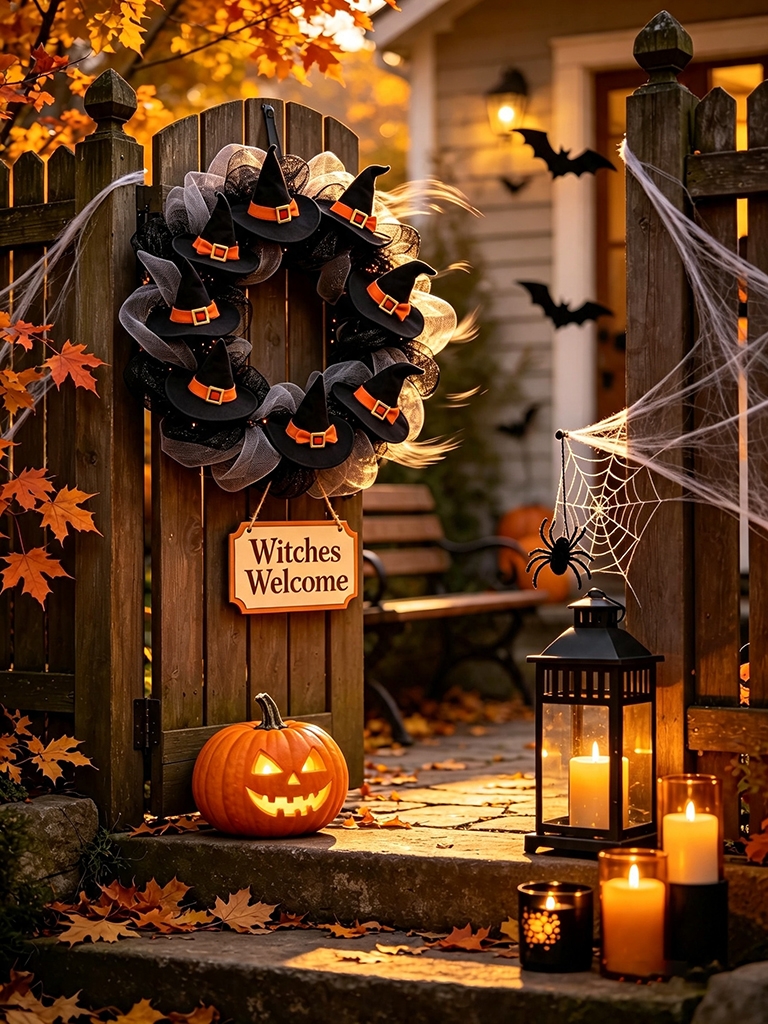
This one makes people do a double-take from the sidewalk. There’s something delightfully whimsical about a ring of witch hats spinning slightly in the breeze, and tilting each hat at a different angle gives the whole wreath movement and personality.
It reads as “playful spooky” rather than terrifying, which makes it a great choice for family neighborhoods. If you can’t find mini witch hats at your local craft store, they’re cheap and abundant on Amazon – or you can make your own from black felt using a simple cone-and-circle template – it takes about five minutes per hat.
Space the hats evenly around a foam form, hot gluing the brims at alternating angles so they appear to dance in a circle. Add tiny buckles or orange bows to each hat for detail, and finish with a “Witches Welcome” sign.
Wind-proof tip: add a dab of glue inside each hat and stuff with tissue paper so they keep their shape even on blustery October evenings.
Cost: ~$80 | Time: 1 hour
Supplies on Amazon:
- Mini Witch Hats
- Foam Wreath Form
- Hot Glue Gun and Glue Sticks
- “Witches Welcome” Sign
- Orange or Purple Ribbon
How to make it:
- Attach 6-8 mini witch hats around a foam wreath form at varying angles
- Hot glue small buckles or bows to each hat
- Add a “Witches Welcome” sign or faux crow to the center
- Hang with a purple or orange ribbon
Eyeball Wreath
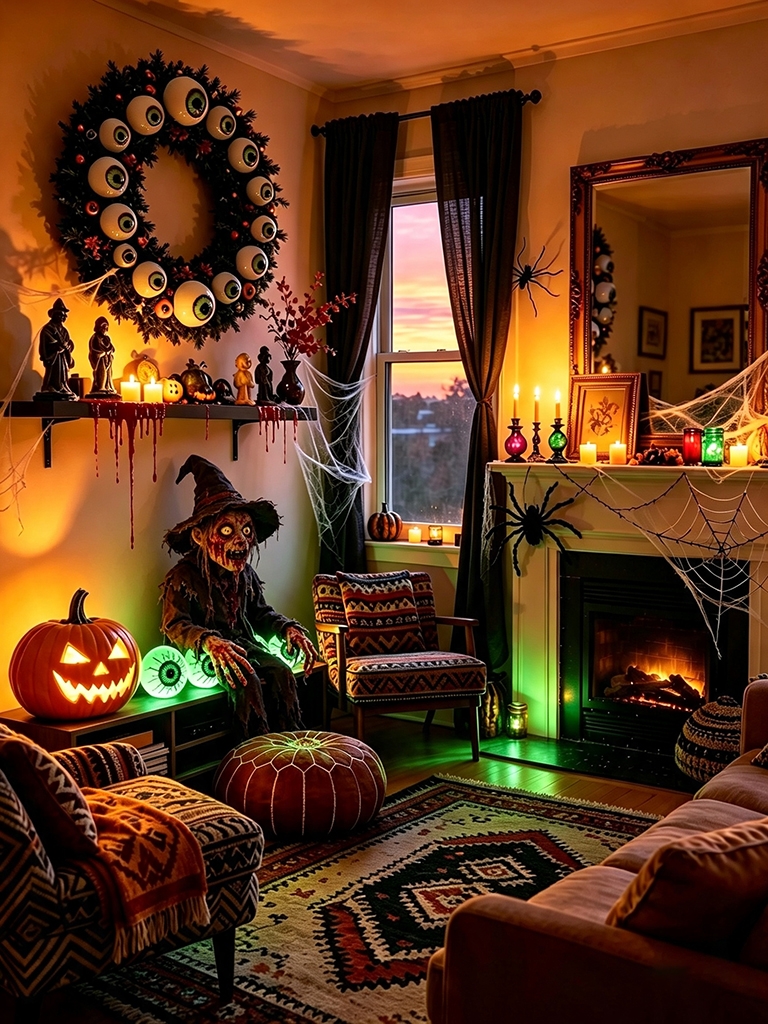
Want the wreath that makes trick-or-treaters squeal? This is it. A wreath completely covered in eyeballs is gloriously gross, and it’s shockingly simple – plastic eyeballs are sold in bulk packs for just a few dollars, and you literally glue them on until no form peeks through.
The key is using eyeballs of slightly varied sizes so the coverage looks natural and dense. This one is a favorite for Halloween parties, haunted doorways, and anyone with teenagers who love all things creepy. Pro move: mix in a few glow-in-the-dark eyeballs so the wreath glows eerily after sundown.
It’s a guaranteed conversation starter and one of the most photographed Halloween wreaths on the block.
Cost: ~$62 | Time: 1 hour
Supplies on Amazon:
- Plastic Eyeballs Bulk Pack
- Foam Wreath Form
- White Spray Paint
- Hot Glue Gun and Glue Sticks
- Glow-in-the-Dark Eyeballs
How to make it:
- Paint a foam wreath form white or cover it with white ribbon
- Hot glue plastic eyeballs over the entire surface, layering to fill gaps
- Mix sizes for a fuller, more realistic look
- Add faux blood drips or spider webs for extra creep factor
Buffalo Plaid Fall-oween Wreath
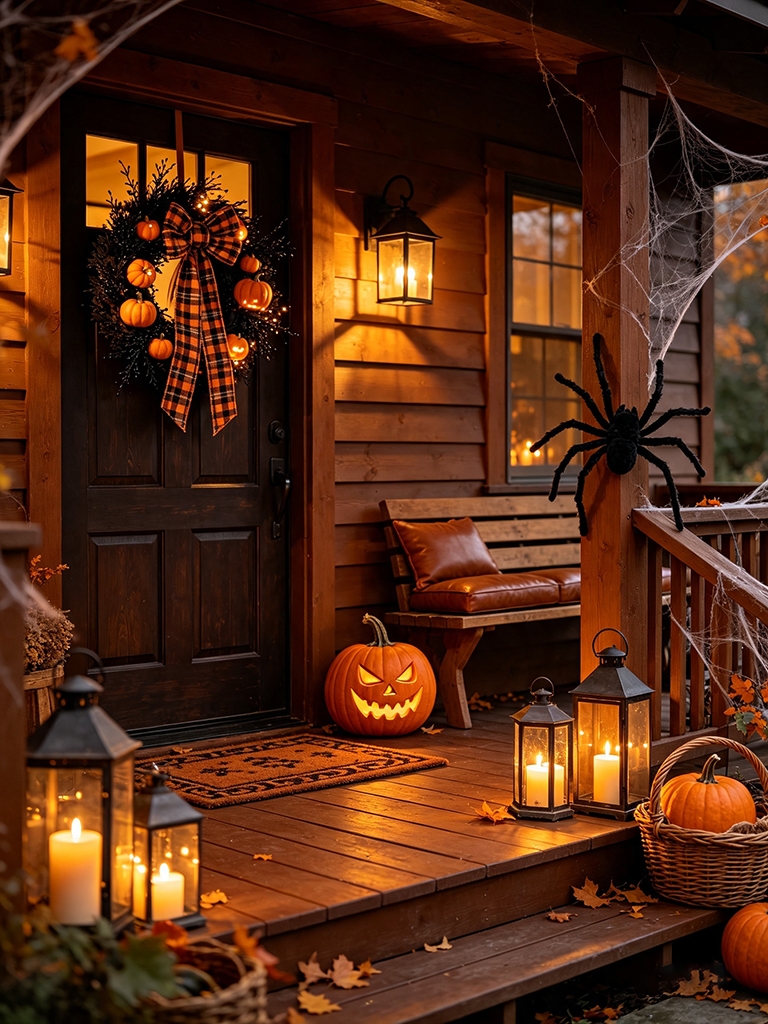
Not everyone wants their porch to look like a haunted house – and this wreath is the perfect middle ground. Buffalo plaid ribbon, warm pumpkins, and a touch of black create a “Fall-oween” look that carries you from October straight through Thanksgiving.
It’s the most versatile wreath on this list and ideal for homes with neutral, farmhouse, or cozy-cabin decor. The plaid ribbon does most of the visual heavy lifting, so even a total beginner gets polished results.
Swap the accent picks seasonally (mini pumpkins for October, red berries for November) and this single wreath covers your entire holiday lineup for under $15 total.
Cost: ~$72 | Time: 1 hour
Supplies on Amazon:
How to make it:
- Wrap a foam wreath form in buffalo plaid ribbon, securing with hot glue every few inches
- Attach small faux pumpkins, pinecones, and autumn greenery picks
- Add a black-and-white check bow at the top
- Tuck in one or two black crows or “Boo” accents for Halloween flair
|
MUST READ: |
Spider Infestation Wreath
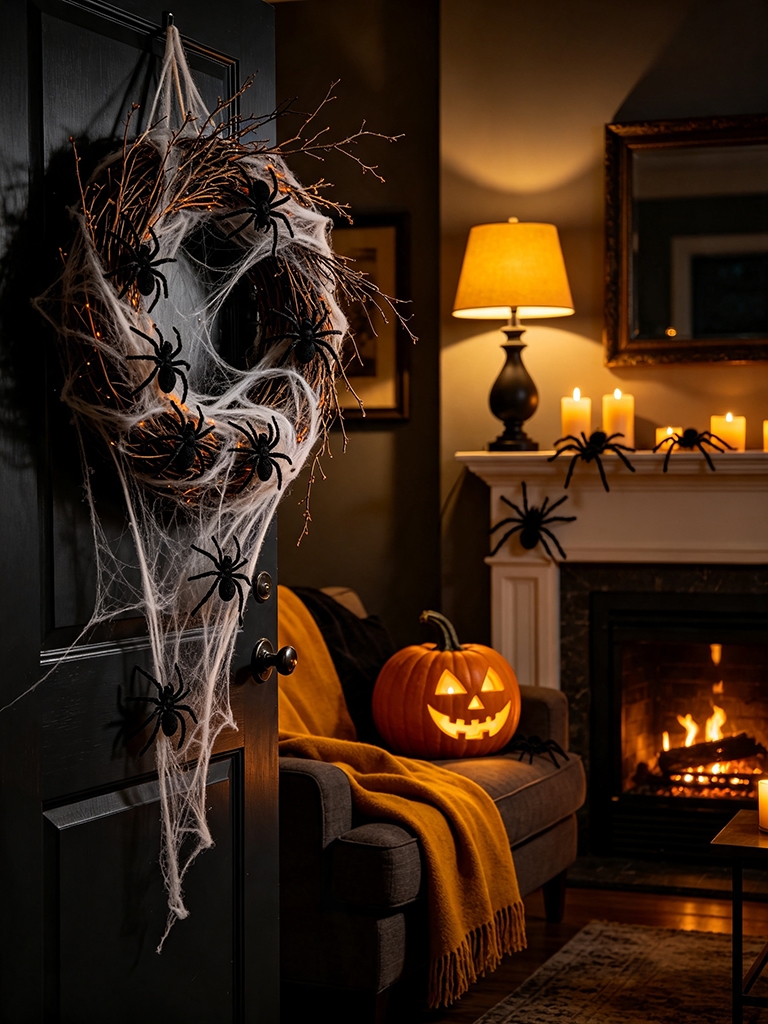
Sometimes the scariest wreath is the simplest one. This design features dozens of black spiders “crawling” across a webbed wreath – a design that’s cheap, fast, and legitimately creepy from a distance.
Bulk spider packs cost just a few dollars, and the layered faux webbing creates a cocooned, abandoned-house effect.
This is the wreath to choose if you love horror movie vibes but only have one evening to craft. For maximum impact, hang it low with dim porch lighting and let the oversized furry spider stealing the center stage do all the work. Arachnophobes beware: guests may refuse to touch your doorbell.
Cost: ~$69 | Time: 45 minutes
Supplies on Amazon:
How to make it:
- Wrap a foam wreath form in black yarn or ribbon
- Stretch faux spider webbing thickly over the entire form
- Glue assorted black spiders on top and “crawling” down the sides
- Add one large furry spider as the centerpiece
- Finish with a drip of red “blood” accents if you dare

Candy Wreath (Edible & Fun!)
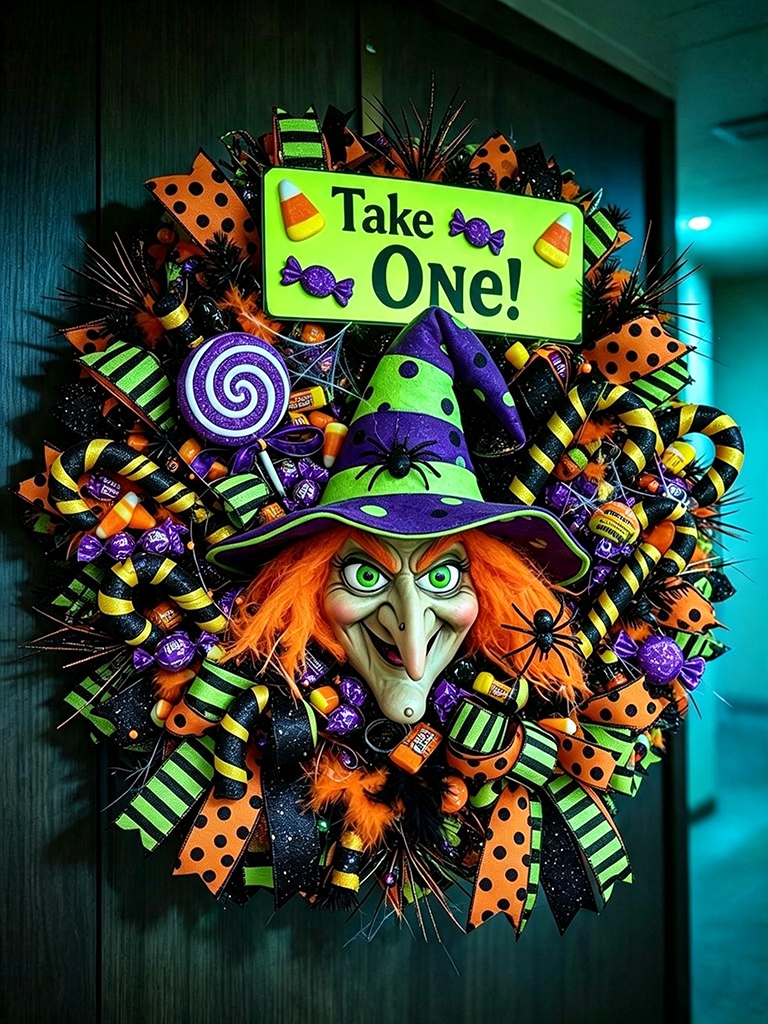
The only wreath on this list guests can eat! Wrapped candies hot-glued in colorful layers create a vibrant, nostalgic wreath that doubles as an interactive trick-or-treat station.
Kids absolutely love picking a piece on their way to the door, and it becomes a genuine neighborhood highlight. Use individually wrapped, weather-resistant candies like lollipops, Tootsie Rolls, and caramels.
One honest warning: if you hang this one outdoors, plan to refresh it occasionally – candy plus rain equals sticky sadness. Best hung in a covered entryway, this wreath is part decoration, part tradition, and 100% the reason your house becomes the favorite stop on the block.
Cost: ~$87 | Time: 1.5 hours
Supplies on Amazon:
- Individually Wrapped Candy Variety Pack
- Foam Wreath Form
- Halloween Ribbon
- Hot Glue Gun and Glue Sticks
- “Take One” Halloween Sign
How to make it:
- Wrap a foam wreath form with festive Halloween ribbon
- Hot glue individually wrapped candies in color-blocked sections around the form
- Fill gaps with smaller candies for full coverage
- Add a “Take One!” sign and ribbon hanger
FAQs
What’s the best glue for outdoor Halloween wreaths?
A high-temperature hot glue gun is the most reliable choice for outdoor wreaths, as it holds plastic, foam, and fabric securely in fluctuating temperatures. For heavier items like skeleton hands or large pumpkins, reinforce joints with floral wire or toothpicks. Avoid regular craft glue outdoors – it softens in heat and fails in rain.
How do I protect my DIY wreath from rain and wind?
Choose weather-resistant materials like deco mesh, plastic, and grapevine rather than paper or fabric. Spray finished wreaths with a clear acrylic sealer for extra protection, and hang them in a covered entryway when possible. Secure decorations with hot glue plus wire, and take the wreath down before storms or freezing nights to extend its life.
How do I hang a wreath without damaging my door?
Use an over-the-door wreath hanger – no nails, screws, or sticky residue. For glass doors, suction-cup hooks work beautifully. If you prefer ribbon, loop it over the top of the door and secure it inside with a command hook. All three options hold heavy wreaths securely and peel away cleanly after the season ends.
Can I make these wreaths with kids helping?
Absolutely! The candy corn tulle wreath, yarn pom-pom wreath, and cheesecloth ghost wreath are the most kid-friendly – they only require cutting, knotting, and gluing with supervision. Pre-cut the materials for younger children, let them handle the placement, and save hot gluing for adults. It’s a fantastic family craft afternoon and makes adorable seasonal keepsakes.
How should I store my Halloween wreath after the season?
Place each wreath in a large plastic storage bin or a dedicated wreath storage box, wrapping it loosely in tissue paper to protect delicate pieces. Keep it in a cool, dry place away from direct sunlight, which fades colors. Avoid stacking heavy items on top. Stored properly, most DIY wreaths last three to five seasons easily.
Conclusion
DIY Halloween wreaths are one of my favorite ways to give a front door a seasonal makeover without spending a fortune or needing advanced crafting skills. After working through these designs, I found that simple materials, a clear color palette, and a few well-chosen details can create a surprisingly polished result.
From the spooky eyeball wreath and dramatic black-rose gothic design to the cozy buffalo-plaid Fall-oween style, each project offers a different look while keeping the supply cost under $100 based on our project testing and material costs. That makes these wreaths especially practical if you want a handmade Halloween decoration without committing to an expensive store-bought piece.
One final tip from experience: if your wreath includes lights, candles, dried foliage, or other flammable materials, think about placement as carefully as appearance. The U.S. Consumer Product Safety Commission recommends keeping burning candles away from decorations and using flameless, battery-operated lights where appropriate. The National Fire Protection Association also advises keeping Halloween decorations away from heat sources and keeping exits clear.
My advice? Start with one wreath this weekend. Hang it on the door, step back, and enjoy that little bit of pride that comes with making something yourself. And if you find yourself already planning next year’s version afterward, don’t say I didn’t warn you. That’s half the fun of Halloween crafting.
Craft on, witches.

Enjoying our content? Make us a preferred source on Google.





Add comment