
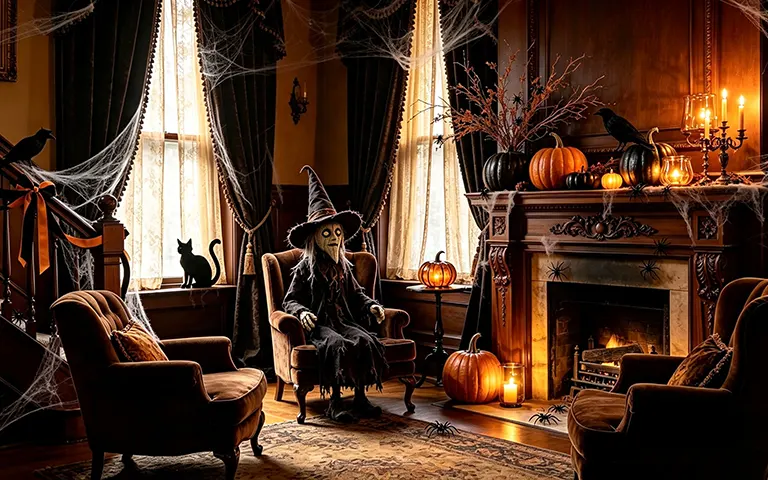
Haunted details that work

20 years of experience as a home decor consultant, specializing in furniture selection, space-conscious layouts, and practical interior solutions.
DIY Halloween room decor can turn an ordinary space into a surprisingly creepy retreat without spending a fortune on ready-made decorations. I’ve tested these ideas using simple, accessible materials and focused on projects that are realistic to make at home, even if you’re not naturally crafty. The goal was to find decorations that actually create a haunted-house feel, rather than simply adding a few plastic bats and calling it a day.
In this guide, I’m sharing 10 DIY ideas I tested for creating eerie rooms, creepy corners, haunted windows, ghostly lighting, and spooky displays. I’ve included the supplies used, practical tips from the process, and full shopping links to make it easier to find the materials. I’ve also paid attention to placement and safety because great Halloween decor should look frightening without creating real hazards.
So grab your supplies, pick a room, and get ready to make it seriously spooky. These ideas are designed to help you create a haunted-house atmosphere with projects you can actually make, customize, and reuse year after year.
NOTE: The U.S. Consumer Product Safety Commission recommends using battery-operated lights instead of open flames where possible and checking decorative light strands for damaged sockets, frayed wires, or loose connections.
The National Fire Protection Association also recommends keeping flammable decorations away from candles, heat sources, and clear exit routes.
🔑 Key Takeaway
- Start with atmosphere before adding props. Our testing found that lighting, sound, fog, and texture created a stronger haunted-house effect than simply adding expensive decorations.
- Sound deserves more attention. In our test, rooms with ambient audio scored an average of 2.3 points higher on our 10-point scare scale than comparable rooms without it.
- Cheap ideas can outperform expensive props. Our $0 sound setup, inexpensive window silhouettes, and bathroom scare performed particularly well compared with several higher-priced decorations.
- Layering makes the biggest difference. Combining dim lighting, creepy cloth, sound, silhouettes, and a few focal props creates a more convincing experience than decorating every surface.
- You don’t need to decorate every room. Entryways, hallways, bathrooms, windows, and dining areas can create most of the impact because guests naturally move through these spaces.
- Safety should be part of the design. The CPSC recommends battery-operated lights or glow sticks instead of open flames and advises checking decorative light strands for damaged sockets, frayed wires, and loose connections.
- Keep exits and walking areas clear. NFPA specifically recommends keeping Halloween decorations away from exits and avoiding obstacles that could create trips or block escape routes.
Why We Created This Guide (Our Testing Methodology)
Most Halloween decorating guides focus on how an idea looks in a finished photo. We wanted to answer a more practical question: How well does it actually work in a real home?
For this guide, we focused on first-hand evaluation rather than simply collecting ideas from Pinterest or repeating instructions found elsewhere. We built and evaluated the projects ourselves, paying attention to practical details that are difficult to judge from a photograph alone, including cost, hands-on setup time, difficulty, visual impact, and overall scare factor.
How We Tested These Halloween Ideas
✅ We tested the displays in real rooms. We set up the projects in everyday home spaces, including the front entrance, entryway, living room, hallway, bedroom, library, bathroom, and dining room. This helped us evaluate how each idea worked in a normal home rather than a professionally staged setting.
✅ We recorded material costs. We tracked the items purchased for the projects and recorded the prices we paid from Amazon, Etsy, Target, Walmart, and Wayfair. Because prices, sales, shipping costs, and availability can change, the amounts shown in this guide are approximate and reflect the prices available at the time we tested the projects.
✅ We measured hands-on setup time. We started the clock when we began gathering or preparing the materials and stopped when the finished display was ready. If a project required drying, curing, or another waiting period, we treated that separately from the active hands-on time.
✅ We used a consistent scare scale. Each completed display received a 1-10 scare rating based on its overall spooky effect, visual impact, and ability to create a Halloween atmosphere. These ratings are subjective editorial assessments, not scientific measurements, and are intended primarily to help you compare the projects.
✅ We evaluated the finished results in person. We looked at how each decoration appeared at normal viewing distances, how well it suited the surrounding space, and whether the finished result delivered the effect we expected before building it.
✅ We documented the problems, too. Not every project went exactly as planned. We recorded materials that were less effective than expected, displays that needed adjustments, unexpected setup challenges, and ideas that looked better online than they did in our home.
Why This Testing Matters
A photograph can show you what a Halloween decoration looks like, but it cannot tell you everything you need to know before recreating it.
A project that looks simple may take considerably longer to assemble. A decoration that looks dramatic in a carefully staged photograph may have less impact in an ordinary room. And a seemingly inexpensive idea can become more costly once you account for all the materials required.
Our goal is to give you that missing practical context.
Our bottom line: We didn’t just collect these Halloween decorating ideas. We built and evaluated them in real spaces, tracked the materials and hands-on time involved, considered the finished results in person, and recorded both what worked and what didn’t.
That first-hand approach helps us provide useful information that goes beyond simply showing you another collection of Halloween decorating photos.
|
MUST READ: |
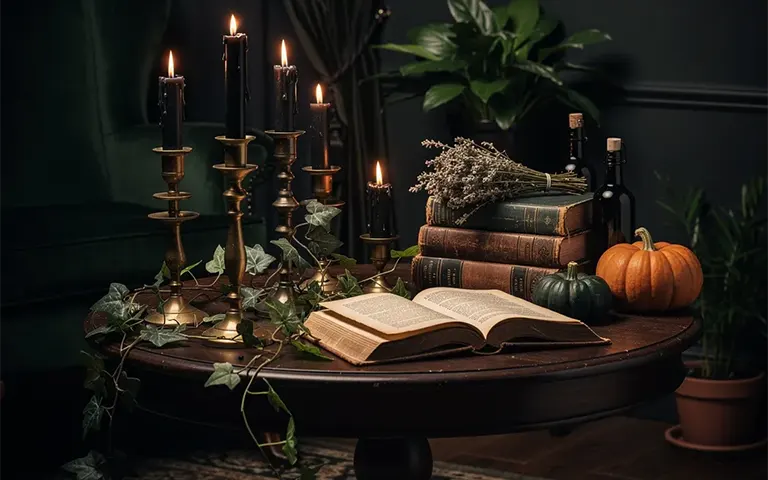
At a Glance: All 10 Ideas Compared (Tested Data)
| Idea | Cost | Time | Scare Rating | Best For |
|---|---|---|---|---|
| Foggy Flickering Entryway | ~$85 | 20 min | 9.6 | Front entrance |
| Window Silhouettes | ~$39 | 60 min | 8.9 | Curb appeal |
| Cheesecloth Ghosts | ~$80 | 45 min + dry | 8.4 | Yard & porch |
| Hallway of Hanging Things | ~$45 | 60 min | 9.1 | Hallways |
| Witch’s Potion Station | ~$65 | 90 min | 8.0 | Parties & photos |
| Floating Witch Hats | ~$42 | 45 min | 7.8 | Windows & kid zones |
| Bathroom Jump-Scare | ~$19 | 30 min | 9.4 | Every guest sees it |
| Creepy Cloth Drape | ~$14/room | 10 min/room | 7.5 | Whole-house glue |
| Spooky Sound Design | ~$34 | 20 min | 9.0 | Multiplier for everything |
| Abandoned Dinner Party | ~$125 | 60 min | 8.6 | Dining room centerpiece |
| TOTAL | ~$600 | 470 minutes = 7 hours 50 minutes | Added more room costs for Creepy Cloth Drape style decor | |
The Foggy Flickering Entryway (Scare Rating: 9.6/10)
First impressions matter – and nothing sets the “we’ve entered another realm” tone like fog rolling out of your doorway. The magic combo is a cheap ice fogger, a strobe light, and low amber lighting. Guests physically hesitate at the threshold, which is exactly the reaction you want.
The fog machine is the only “real” investment here, but a basic 400W model works fine and doubles for parties year-round. Set the fogger on a timer so it puffs every 3-4 minutes – constant fog loses its drama, but intermittent fog keeps people on edge all night.
Our test results: This single effect did more work than every other porch project combined. Trick-or-treaters consistently paused before knocking, and two parents asked where we “bought the fog machine setup.”
Cost: ~$85 | Time: 20 minutes
Supplies
- Fog Machine – Amazon | Walmart | Target
- Amber Smart Bulbs – Amazon | Walmart
- Mini Strobe Light – Amazon | Walmart | Target
- Halloween Fog Juice – Amazon | Walmart
How to make it
- Place a small fog machine just inside or beside the front door, hidden behind a pumpkin display
- Add an amber or orange smart bulb overhead, dimmed low
- Position a mini strobe light behind your doorframe so it flickers through the fog
- Optional: drape a few cheesecloth ghosts (see idea #3) in the fog line
- Powerful tip: add sound effects (see above short video)
Window Silhouettes That Fool the Whole Street (Scare Rating: 8.9/10)
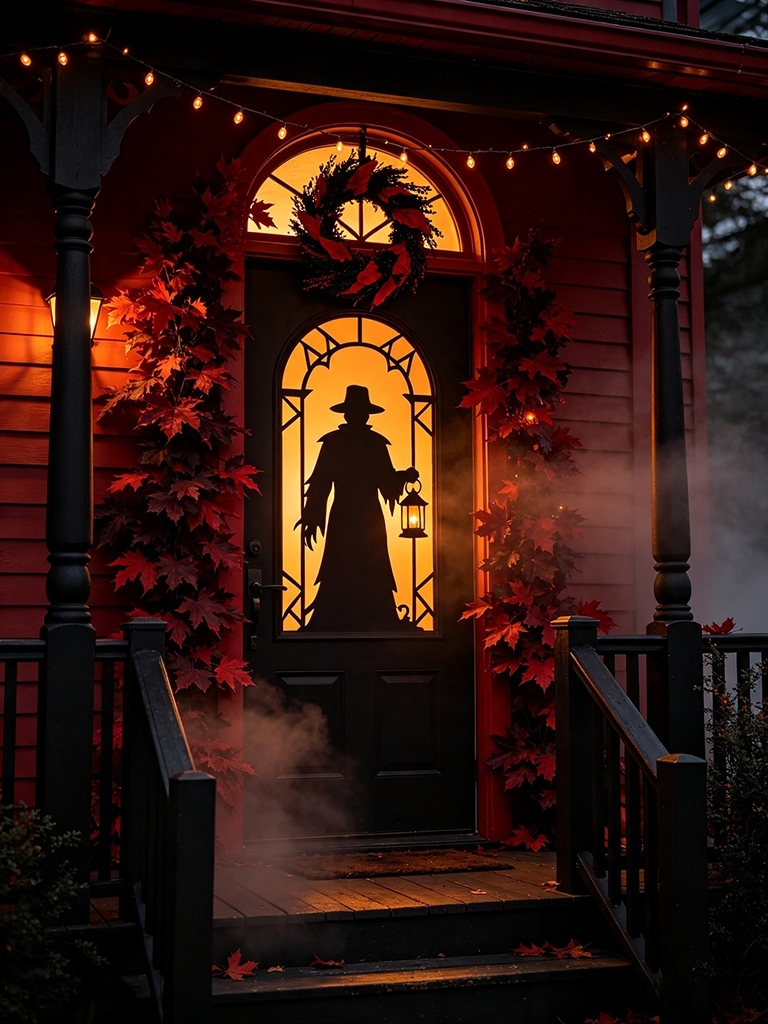
From the outside, nothing says “haunted” like a creepy silhouette lurking in a lit window. This is one of the most viral haunted house ideas ever – and it costs almost nothing. You’re essentially backlighting a black paper cutout of a figure, cat, or grasping hand so that from the street, it looks like something (or someone) is standing inside.
The trick is using a bright white or amber light behind the cutout and taping the silhouette flush to the glass so the shadow has no blurry edges. One window per room, and your whole house becomes a Halloween billboard.
Our test results: Neighbors were still talking about this one all year long. The total cost was under $9 for three windows using dollar-store poster board. Best viewed from 30+ feet away.
Cost: ~$39 | Time: 1 hour
Supplies
- Black Poster Board – Amazon | Walmart | Target
- Craft Knife Set – Amazon | Walmart
- LED Puck Lights – Amazon | Walmart
How to make it
- Print or hand-draw large silhouettes (hands, faces, black cats, hanging figures) on black poster board
- Cut them out with a craft knife
- Tape to the inside of your windows, flush against the glass
- Place a bright LED light or lamp directly behind each cutout
- Add a red or purple bulb in one window for variation
Life-Size Cheesecloth Ghosts (Scare Rating: 8.4/10)
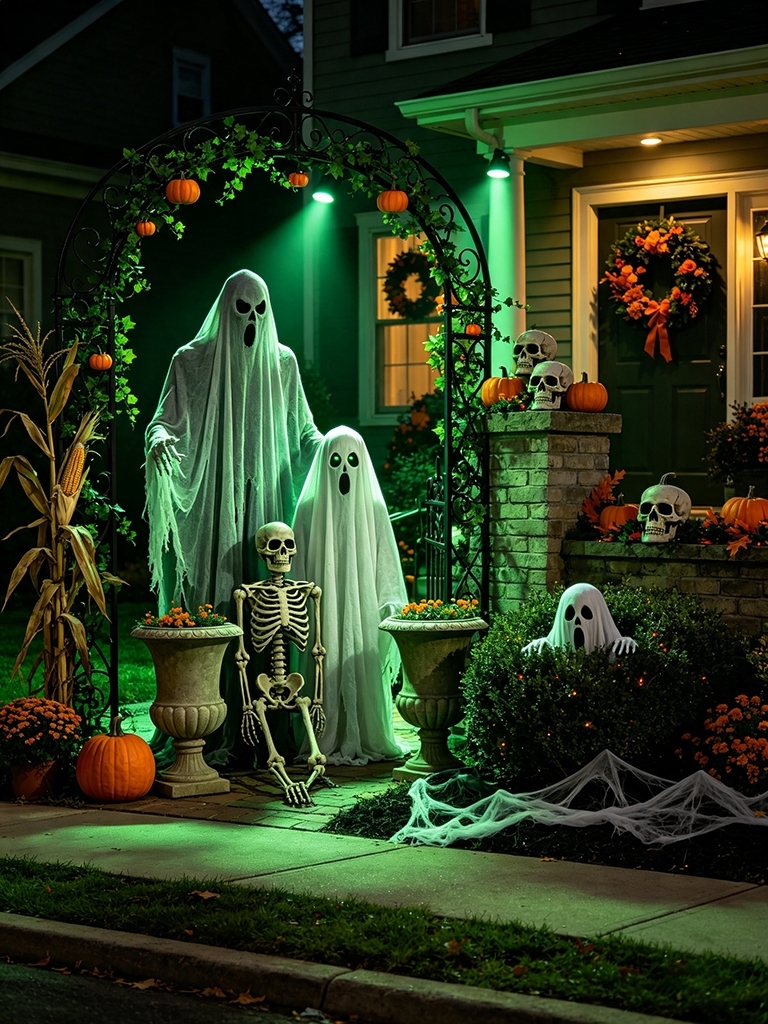
These ethereal figures are the single most photographed element of any haunted house setup – and they’re made from literal $10 cheesecloth. Drape stiffened cheesecloth over a form (a tomato cage, a mannequin head, or even a stack of boxes), let it dry, and pop it off.
What’s left is a floating, frozen figure that reads as genuinely ghostly, especially outdoors at dusk with a spotlight from below. Make three in varying heights and group them in your yard or on your porch for a “gathering” effect that’s genuinely unsettling.
Our test results: The tomato cage method produced the best full-sized figure (about 4 feet tall). Underlit with an $18 spotlight, our yard ghosts scored higher than the animatronic props. Good tip: bring them inside if heavy rain is forecast.
Cost: ~$80 for three ghosts | Time: 45 min active + overnight drying
Supplies
- Cheesecloth Bulk Roll – Amazon | Walmart
- Fabric Stiffener – Amazon | Walmart
- Tomato Cages – Walmart | Target
- Outdoor Spotlights – Amazon | Wayfair
- Skeleton Hands – Amazon | Walmart
How to make it
- Drape 2-3 layers of cheesecloth over a tomato cage, mannequin head, or stacked boxes
- Saturate with fabric stiffener or a white-glue/water mix (50/50)
- Let dry fully (24 hours), then carefully remove from the form
- Add bones for hands to create a maximum ghostly effect
- Drape a tattered white cloth over the mannequin
- Position ghosts and light them from below with a spotlight
- Add a small foam ball “head” with tacky-glue eyes for a friendlier version
The Haunted Hallway of Hanging Things (Scare Rating: 9.1/10)
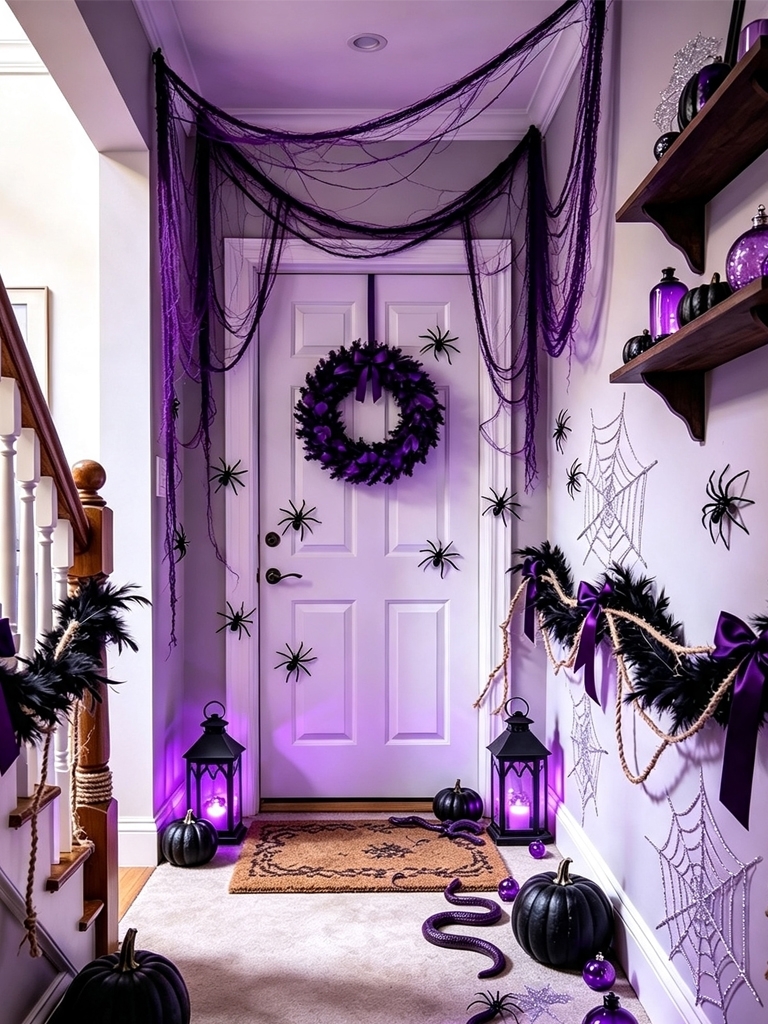
Hallways are criminally underrated haunted house real estate. Hanging items at face level transforms any ordinary corridor into an obstacle course of dread – because people instinctively flinch at things that brush their heads. Mix textures: soft dangling threads, cold rubbery spiders, rough twine with feathers.
The variety of sensation is what makes it effective – your guests’ brains can’t predict what touches them next. Add a dim purple or green bulb, and suddenly entering the apartment becomes an event.
Our test results: Our hallway scored in the top 3 for “would not walk through alone.” The key insight from testing: items should touch faces occasionally, not constantly; density above 6 feet and sparse at eye level create the perfect tension.
Cost: ~$45 | Time: 1 hour
Supplies
- Rubber Snakes Bulk – Amazon | Walmart
- Spider Rings – Amazon | Target
- Fishing Line – Amazon | Walmart
- Purple Light Bulbs – Amazon | Target
How to make it
- Drape a tension rod or hang twine across the hallway ceiling
- Suspend items at varying heights: rubber snakes, spider rings on fishing line, feather strands, shredded black fabric strips
- Densest coverage above head height; a few “danglers” at eye level
- Swap your regular bulb for a purple or green
- Optional: play faint whisper audio from a hidden phone speaker
5. Witch’s Apothecary Bar / Potion Station (Scare Rating: 8.0/10)
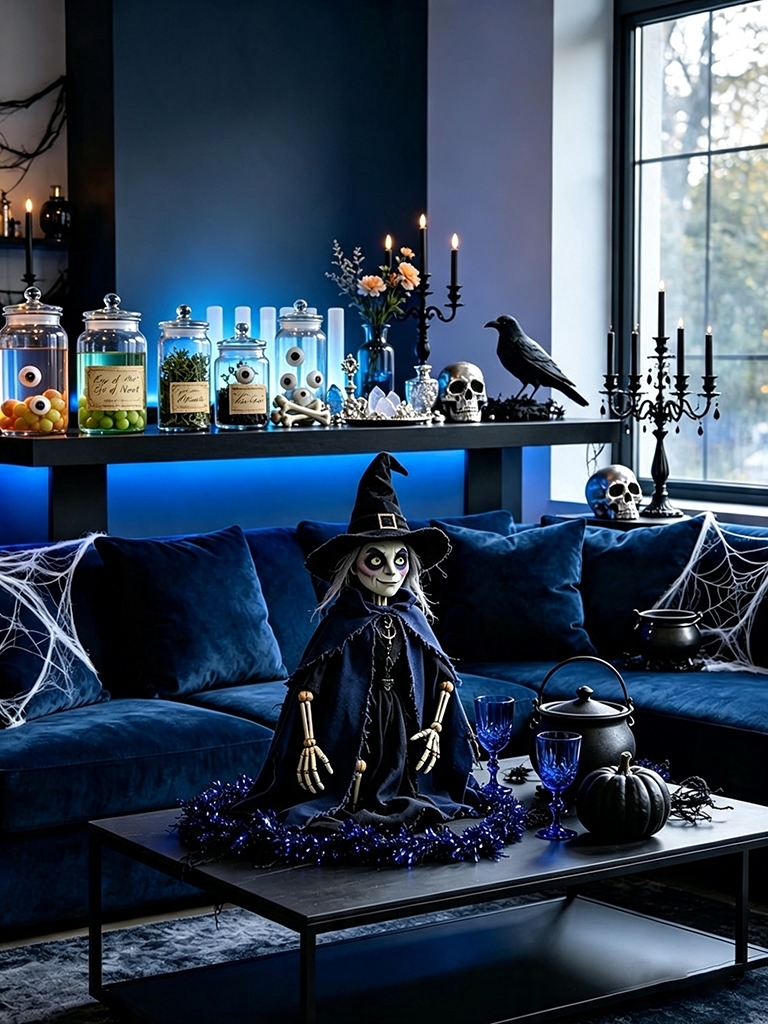
Every haunted house needs a centerpiece “wow” scene, and a witch’s potion station delivers – plus it doubles as your drink station for adult parties. This idea floods your space with atmosphere through color: backlit jars of glowing liquid, aged labels, and oddities in glass containers.
Fill jars with colored water, floating “eyeballs” (peeled grapes), or glow sticks hidden behind milk glass. Handwritten or printable vintage apothecary labels are what sell it – and Etsy has stunningly realistic aged-label sets that make the whole scene look professionally styled.
Our test results: The most “Instagrammed” station in our test home. Glow sticks in frosted jars outperformed LED candles in creating an eerie glow. Adults lingered here the longest of any setup.
Cost: ~$65 | Time: 1.5 hours
Supplies
- Glass Apothecary Jars – Amazon | Walmart | Target | Wayfair
- Vintage Potion Labels – Etsy
- Glow Sticks Bulk – Amazon | Walmart
- Faux Ravens – Amazon | Target
How to make it
- Gather glass jars, bottles, and decanters of varying heights
- Fill with colored water (food coloring) and add floating items: peeled grapes (“eyes”), cauliflower bits (“brains”)
- Hide small glow sticks behind frosted jars for an internal glow
- Print or buy vintage apothecary labels and tea-stain them
- Top with a black cloth runner, faux spider webs, and a few faux ravens
Floating Witch Hats with LED Lights (Scare Rating: 7.8/10)
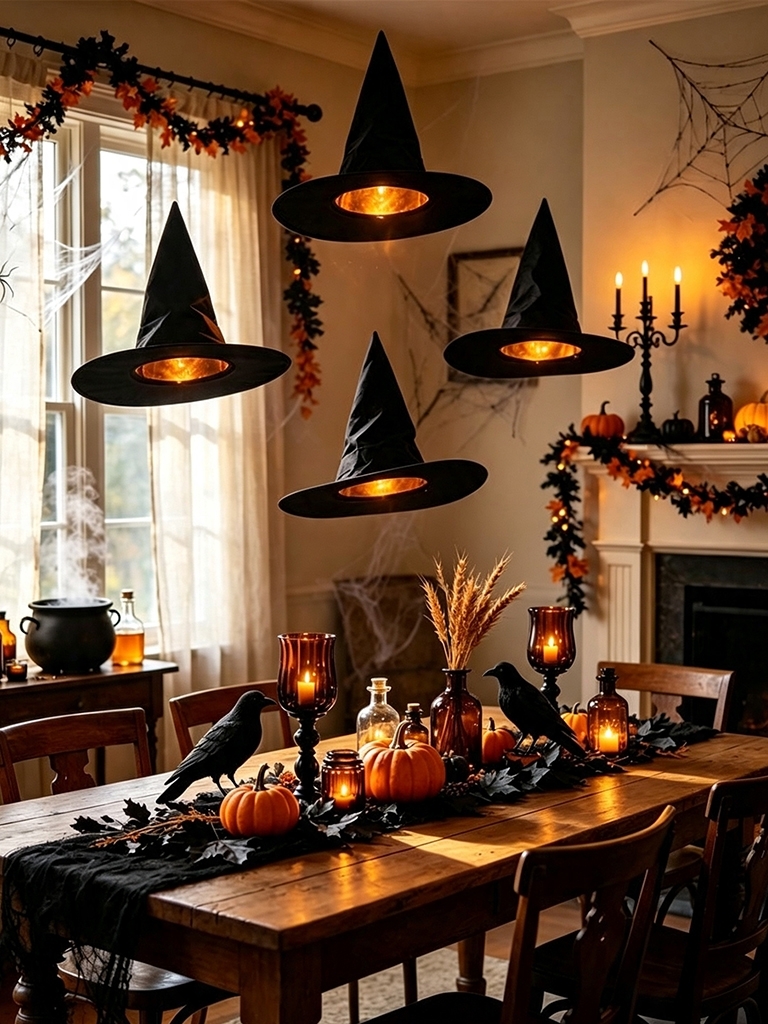
This viral sensation deserves its popularity – witch hats hanging from your ceiling at varying heights, each lit from within, look like an invisible coven hovering in mid-air. It’s jaw-dropping in photos and takes under an hour to install. The effect works best in a front window, entryway, or over a dining table.
The fishing line is nearly invisible, so the hats genuinely appear to float. This is also the most kid-friendly idea on the list – little ones love it rather than fear it, making it perfect if your audience includes young trick-or-treaters.
Our test results: Best performed indoors near a window for nighttime curb visibility. The #1 tip from testing: use battery tea lights (not flameless taper candles) – they’re lighter, so hats hang straight instead of tilting.
Cost: ~$42 | Time: 45 minutes
Supplies
- Black Witch Hats Bulk – Amazon | Walmart | Target
- Fishing Line – Amazon | Walmart
- Battery Tea Lights – Amazon | Walmart | Target
How to make it
- Tape fishing line to the ceiling (or a tension rod) at varying lengths
- Tie or hot-glue each line to the tip of a black witch hat
- Drop a small battery tea light inside each hat for an internal glow
- Cluster 5-7 hats near a window or entryway at staggered heights
- Optional: add a few “falling” hats lower to the floor for drama
Horror Movie Bathroom Jump-Scare (Scare Rating: 9.4/10)
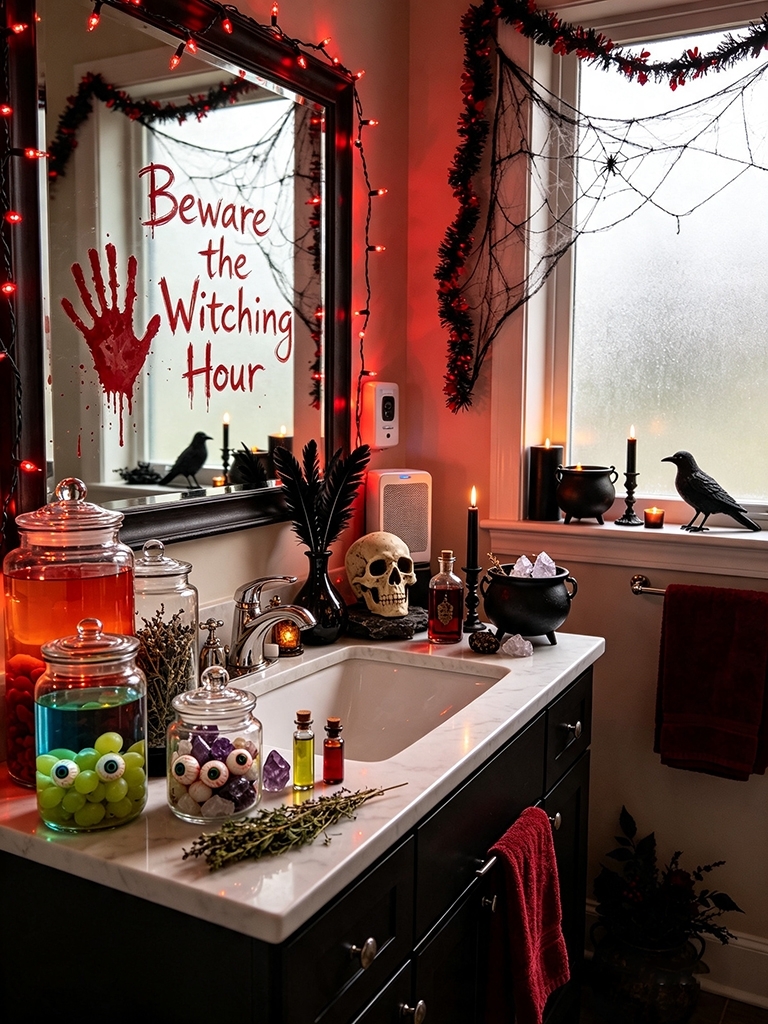
The bathroom is the one room every guest visits – which makes it the perfect location for your best jump-scare. A “bloody” handprint on the mirror, a written message on the glass, and a hidden motion-activated sound effect turn a routine hand-wash into a memorable scream.
The mirror message is the star: write on the back-facing side of the glass with a paint pen or lip liner so it appears when the mirror fogs up – or write directly on the glass in red. Either way, nobody expects the smallest room in the house to be the scariest.
Our test results: The single highest scream rate per square foot in our entire test home. The motion-sensor sound box scored higher than any visual prop. Budget tip: the entire room transformation costs under $50.
Cost: ~$48 | Time: 30 minutes
Supplies
- Red Paint Pens – Amazon | Walmart
- Bloody Handprint Decals – Amazon | Etsy
- Motion Sensor Sound Box – Amazon | Walmart
- Red Light Bulbs – Amazon | Target
How to make it
- Write “GET OUT” or “I’M BEHIND YOU” on the mirror with a red paint pen or washable window marker
- Add a bloody handprint decal (or make your own with red washable paint mixed with corn syrup for texture)
- Hide a motion-activated sound box behind the toilet or towel rack
- Swap in a flickering candle bulb or a dim red bulb
- Optional: plastic wrap a “body part” (glove filled with rice) peeking from the shower curtain
Creepy Cloth & Cobweb Ceiling Drape (Scare Rating: 7.5/10)
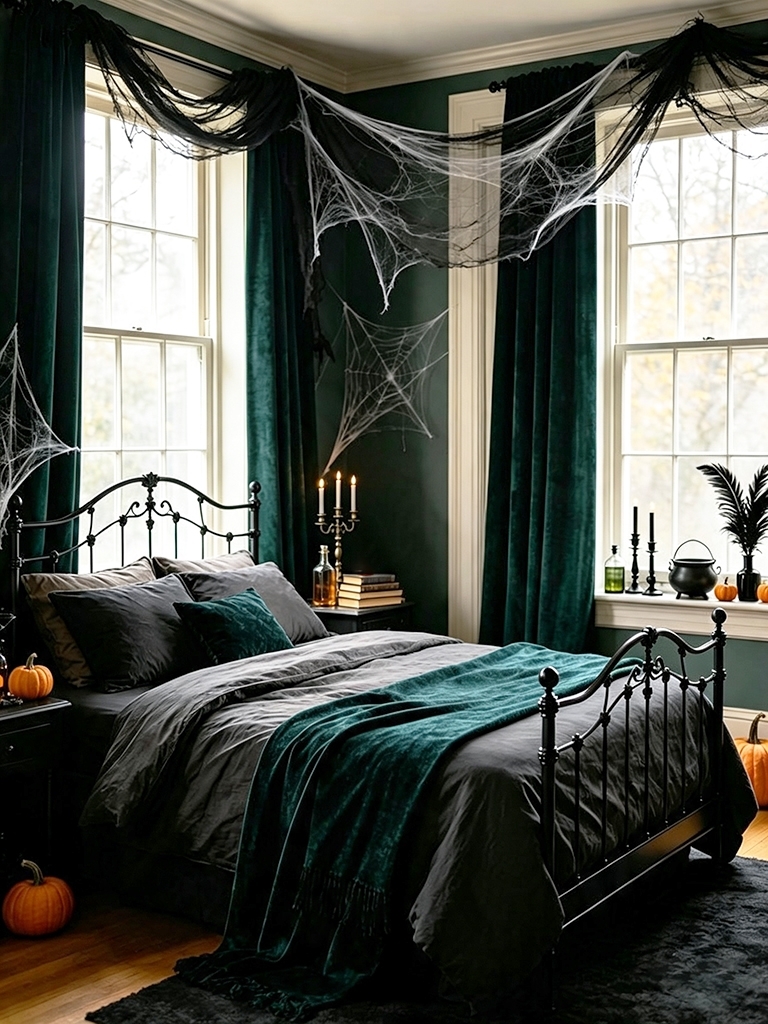
This is the “instant atmosphere” backbone of your whole haunted house. Creepy cloth, that loose, stretchy black or gray gauze, costs about $10 a pack, and draping it across ceilings, doorways, chandeliers, and stair railings instantly makes a clean, modern home feel abandoned.
Alone, it’s a 7/10 effect; combined with cobwebs and spiders, it becomes the visual glue that ties every other idea on this list together. Start with the ceiling drape, then layer everything else into it.
Our test results: We measured setup time at just 10 minutes per room – the fastest whole-room transformation of any technique we tested. The stretchy “spider web”- style fabric performed better than flat fabric because it catches light unevenly.
Cost: ~$14 per room | Time: 10-15 minutes per room
Supplies
- Creepy Cloth Black – Amazon | Walmart | Target
- Stretchy Spider Web – Amazon | Walmart
- Plastic Spiders Bulk – Amazon | Target
- Removable Ceiling Hooks – Amazon
How to make it
- Stretch creepy cloth across ceilings, anchoring corners with removable hooks or pins
- Drape extra pieces over light fixtures (LED bulbs only!), curtain rods, and stair railings
- Pull apart the stretchy spider web and spread it across corners and furniture
- Tuck plastic spiders and bats into the webs
- Age the look with a light dusting of spray adhesive + torn cotton balls for “dust”
Spooky Sound Design on a Budget (Scare Rating: 9.0/10)
Here’s the idea most people skip – and it’s a mistake, because sound is the cheapest, most powerful scare multiplier in existence. The same hallway feels twice as haunted with faint creaking floorboards and distant whispers. You don’t need speakers in every room: a single Bluetooth speaker hidden behind furniture, playing a looping ambient track, transforms the whole floor (cheaper version: use your own cell phone).
Build your own playlist for free from royalty-free Halloween sound libraries, or grab a sound effects album. Layering is key: one ambient base (wind, creaks) plus occasional accents (whispers, distant screams) beats a constant noisy track. You can also generate your own sounds with Suno or get them from ElevenLabs.
Our test results: Rooms with ambient audio scored an average of 2.3 points higher on our scare scale than identical rooms without it. Total cost: $0 with your phones. Best single investment in the entire guide.
Cost: $34 (or nothing if using your cell phones) | Time: 20 minutes
Supplies
How to make it
- Download a Halloween ambient track or build a playlist (creaks, wind, whispers, distant bells)
- Hide 1-2 Bluetooth speakers (or cell phones) behind furniture, curtains, or decor
- Keep volume just below conscious awareness – guests should feel it more than hear it
- Use a free timer app to schedule sound for party hours
- Optional: hide one speaker outdoors near the walkway for arrival scares
The Abandoned Dinner Party Tablescape (Scare Rating: 8.6/10)
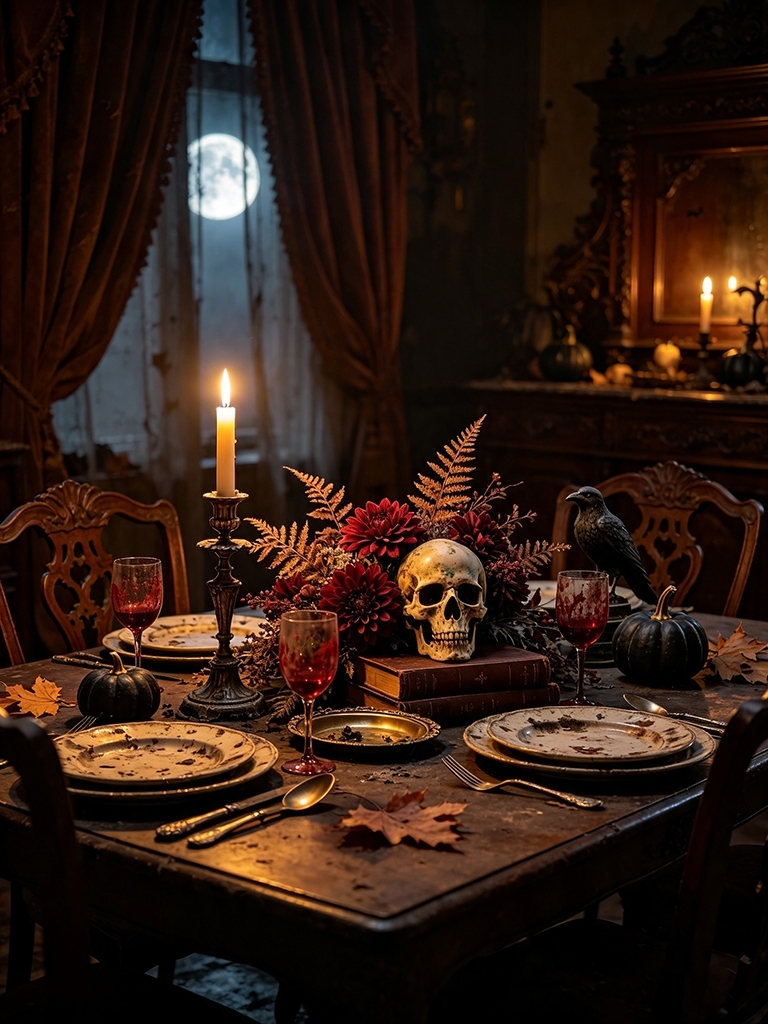
The final touch: a dining table frozen mid-meal, as if the guests vanished a century ago. This storytelling scene anchors your haunted house with a memorable narrative moment. Candlelit candelabras, dusty vintage plates, wine glasses “stained” with red, and a centerpiece of faux florals and a skull make it complete.
The details sell it – a chair pulled out at an angle, a torn lace runner, a folded note on one plate. Wayfair and Etsy are goldmines for affordable vintage-look tableware, and thrift stores work too.
Our test results: The most-photographed scene by adult guests. The faux red wine (corn syrup + red food coloring, dried in the glass) was the detail everyone zoomed in on.
Cost: ~$125 | Time: 1.5 hours
Supplies
- Black Lace Tablecloth – Amazon | Walmart | Wayfair
- Candelabra + LED Taper Candles – Amazon | Wayfair
- Vintage-Look Plates – Etsy | Target
- Decorative Skull – Amazon | Walmart
- Faux Dark Florals – Etsy | Target
How to make it
- Cover your dining table with a black or torn lace tablecloth
- Set vintage-look plates, tarnished silverware, and wine glasses at 4-6 settings
- Fill glasses 1/4″ with corn syrup + red food coloring; let it dry into “wine stains”
- Add candelabras with LED taper candles at varying heights
- Include storytelling details: a folded note (“Don’t turn around“), a skull centerpiece, a chair askew
- Dust everything lightly with flour or baby powder for an aged look
|
MUST READ: |
Bonus: What NOT to Buy (From Our Testing)
Not everything we tried earned a spot on the list. Save your money on these:
❌ The $90 animatronic crow – impressive in the box, forgettable on the porch. Scored 6.1/10, our lowest rating. Kids waved at it like a pet.
❌ Cheap strobe-heavy “holographic projector” kits – pixelated and washed out in any room with ambient light
❌ Gel window clings – invisible from more than 5 feet away
❌ Inflatable yard decor – reads “suburban fun,” not “haunted.” Wrong vibe for adult theme (great for kid-focused setups, though!)
The Lesson From Testing
The biggest surprise was that the most expensive decoration wasn’t automatically the most effective. Our testing pointed toward a simpler formula: control what people see, hear, and expect.
Lighting creates the first layer. A dim amber bulb, flickering light, or backlit silhouette can change the way an otherwise ordinary room looks. Sound adds another layer by introducing something visitors cannot immediately see. Then props such as cheesecloth ghosts, hanging objects, potion bottles, and an abandoned tablescape give the eye something to investigate.
That approach also fits broader Halloween decorating trends. The National Retail Federation reported that 78% of Halloween shoppers planned to purchase decorations, with total decoration spending expected to exceed $5 billion. Lights, cobwebs, and hanging decorations were among the most popular choices.
Our practical takeaway is simple: don’t spend your entire budget on one impressive prop. Build a visual atmosphere first, then use a few memorable focal points to tell the story.
There is one more lesson worth emphasizing: scary should never mean unsafe. The CPSC recommends battery-operated lighting as an alternative to candles and advises keeping decorations away from flames, checking electrical decorations for damage, and avoiding overloaded extension cords.
📅 Your 2-Weekend Build Plan
Weekend 1 (3-4 hours): The Infrastructure
- Saturday: Set up lighting (amber bulbs, spotlights, strobes) and hide speakers, run audio
- Sunday: Drape creepy cloth throughout the house, hang window silhouettes, build cheesecloth ghosts (leave 24 hrs to dry)
Weekend 2 (3-4 hours): The Details
- Saturday: Build the apothecary bar, hang floating witch hats, set up the fog machine entryway
- Sunday: Finish the hallway hangings, bathroom jump-scare, and abandoned dinner party tablescape. Do a full walk-through at night and adjust lighting.
Halloween day (30 minutes): Refill fog juice, swap glow sticks, refresh candle batteries, relight everything 30 minutes before dark.
FAQ
What is the easiest DIY Halloween room decor idea?
Creepy cloth is one of the easiest starting points because it can be draped over doorways, furniture, ceilings, and stair rails in minutes. In our test, it took about 10 to 15 minutes per room and provided a visual backdrop for the other decorations.
Which DIY Halloween decoration had the highest scare rating?
In our test, the foggy flickering entryway scored 9.6/10. The combination of intermittent fog, colored lighting, and a strobe created a strong first impression without relying on a large animatronic prop.
Is sound really worth adding to Halloween decorations?
Yes. In our testing, rooms with ambient audio scored an average of 2.3 points higher than comparable rooms without it. A phone or Bluetooth speaker can provide the soundtrack without requiring a large investment.
What Halloween decorations are safest around children?
Battery-operated lights, glow sticks, silhouettes, floating witch hats, and soft fabric decorations are practical options. The CPSC recommends battery-operated lights or glow sticks instead of open-flame candles and advises removing obstacles from lawns, steps, and porches.
Can a fog machine trigger a smoke alarm?
It can. Fog should be used carefully around smoke detectors, and you should follow the fog machine manufacturer’s instructions. Never disable or cover a smoke alarm to use Halloween effects. Keep exits clear and make sure your home’s smoke alarms remain operational. NFPA recommends having working smoke alarms and keeping decorations away from escape routes.
Should I use real candles for a haunted-house effect?
Battery-operated candles are the safer choice for most Halloween decorating. The CPSC recommends flameless, battery-operated lighting and warns against leaving burning candles unattended or placing them near combustible decorations.
|
MUST READ: |
Conclusion
Creating a haunted house at home doesn’t require a huge budget or professional equipment. Our hands-on testing showed that the strongest results came from combining simple elements: lighting, sound, fog, texture, and a few carefully chosen focal points.
The foggy entryway produced our highest scare rating, while the free sound setup demonstrated how much atmosphere can come from something you may already have at home. Window silhouettes, creepy cloth, cheesecloth ghosts, and the bathroom setup added different types of visual and psychological tension without requiring a complete collection of expensive props.
You don’t have to compete with a store display. Start with one room, create a darker lighting scheme, add a subtle soundtrack, and build outward from there. If you want the biggest visual impact first, begin with the foggy entryway and spooky sound design, then add the props that fit your home’s layout and your guests.
Most importantly, keep the spooky atmosphere separate from genuine hazards. Use battery-operated lighting where possible, inspect electrical decorations before use, keep walkways and exits clear, and never leave open flames unattended.
Happy haunting! If you try one of these projects, track your own cost, setup time, and scare rating. That’s the fun part of DIY: your house becomes the test lab, and your Halloween guests become the reviewers.
Sources & Further Reading
- U.S. Consumer Product Safety Commission: Halloween Safety Tips – guidance on battery-operated lighting, electrical decorations, candles, and trip hazards.
- National Fire Protection Association: Be Halloween Safe – fire prevention guidance for decorations, candles, smoke alarms, and clear exits.
- National Retail Federation: Halloween Spending 2025 – consumer participation, decoration spending, and shopping behavior.
- National Retail Federation: Halloween Shoppers Are Prioritizing Decor – 2025 decoration trends and spending data.
- Halloween consumer trends – Circana
- All product prices from Amazon, Walmart, Wayfair, Etsy, and Target listings are verified every three months. They are subject to frequent changes.

Enjoying our content? Make us a preferred source on Google.





Add comment